Bridge tokens with ZenBridge
ZenBridge is a trust-minimized dApp for moving assets between Zenchain, supported EVM chains (currently Sepolia), and Bitcoin (via zBTC on Zenchain). This guide walks you through sending a transfer and claiming funds on the destination chain.
Note: ZenBridge uses CAIP identifiers (chain, asset, account) for safe, unambiguous cross-chain transfers.
Connect Your Wallet
- Navigate to https://zenbridge.zenchain.io
- Click the "Connect Wallet" button and link your Ethereum wallet.
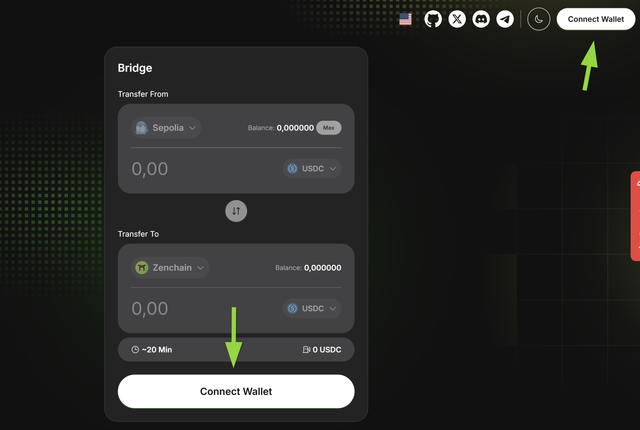
Tip: You’ll need native gas on the source chain to send, and on the destination chain to claim (mint/unlock).
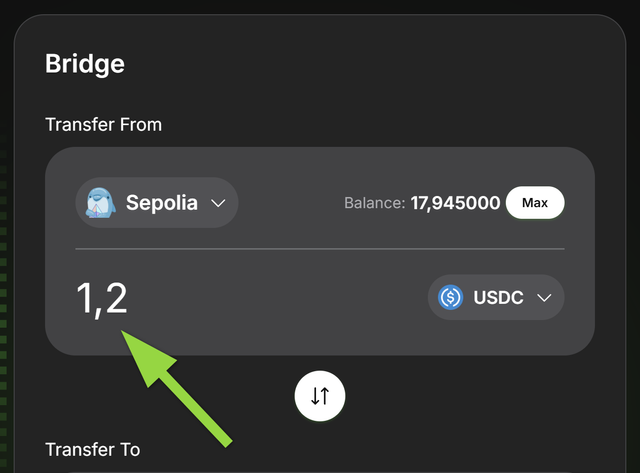
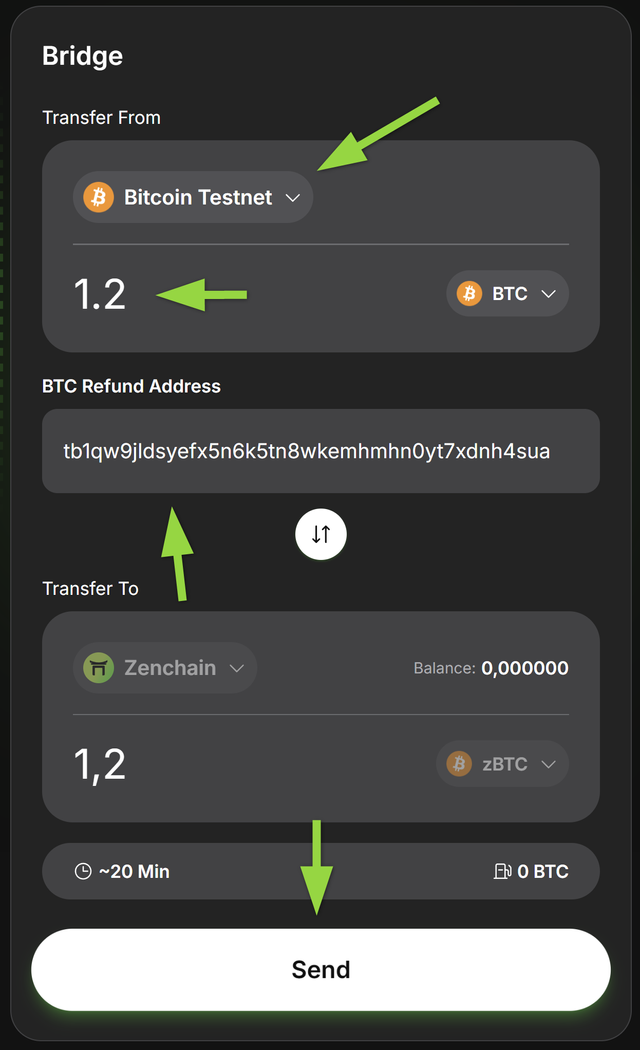
Select the Source Blockchain
You can select the Source Blockchain, which is the network from which you want to transfer your tokens. This is the blockchain where your assets are currently held before being bridged to another network.
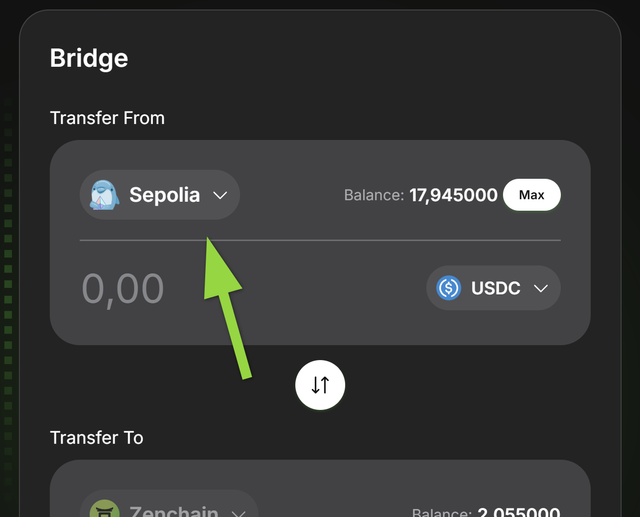
When choosing the source blockchain, ensure that you have sufficient funds in your wallet to cover both the transfer amount and any associated gas fees.
Switch Blockchain (if needed)
You can seamlessly switch between the selected blockchains at any time, allowing you to modify the source and destination networks before initiating a transfer.

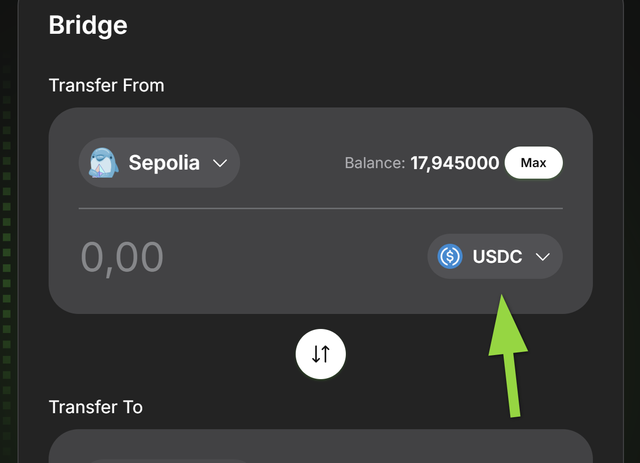
Select the Token
The list of tokens (Supported Tokens) updates automatically based on your selected source and destination.
Before you choose:
- Network compatibility: Some tokens exist on multiple chains; pick the network where your balance resides.
- Bridge support: Not all tokens are available on all routes. If you don’t see a token, try a different source/destination pair.
Check Token balance
After selecting a token, you can view your available balance directly within the interface. If you want to transfer the maximum possible amount, simply click the "Max" button to automatically input your entire available balance into the amount field.
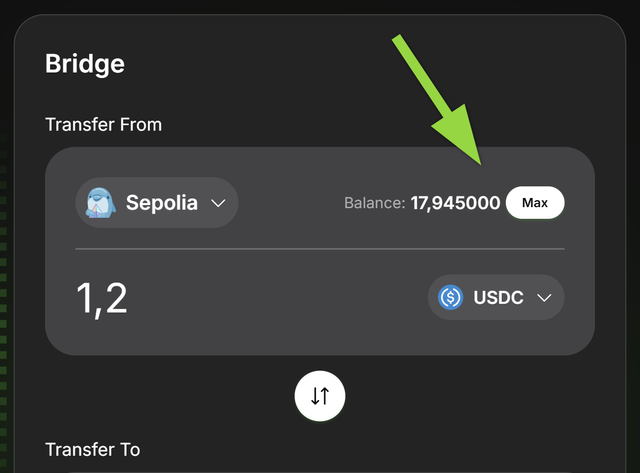
Input amount
You need to enter the exact amount of assets you wish to transfer across chains. This value determines how much of your selected token will be moved from the source blockchain to the destination blockchain.
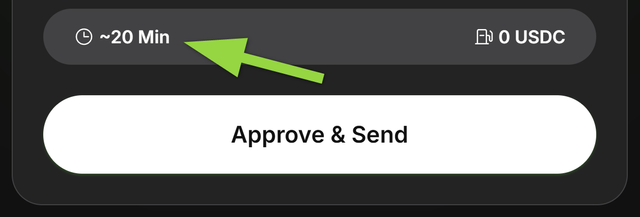
Estimated time and Fees
After selecting the source blockchain, you can view the current bridge fees, which are deducted from the total amount you are transferring. The final amount received on the destination blockchain is calculated as:
Destination amount = Source amount - Bridge fees
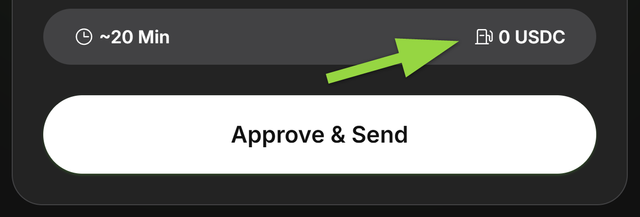
The system also shows an estimated time to assemble the cross-chain proof and signatures.
Note: Timing varies by network conditions and confirmation depth (e.g., Bitcoin confirmations may take longer than EVM).
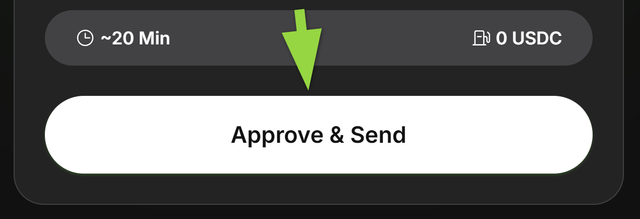
Initiate the cross-chain transaction
When ready, click Approve & Send or Permit & Send (depends on token support):
-
Approve & Send
For tokens without ERC-2612 Permit. Requires two transactions:
- Approve the bridge to spend your tokens
- Send (lock/burn + initiate transfer)
-
Permit & Send
For tokens with ERC-2612 Permit. Lets you sign a permit and send in a single transaction, saving gas.
After sending, you can track progress in the Transactions area.
Behind the scenes:
- The bridge indexes your lock/burn transaction on the source chain.
- Bridge operators process and sign the cross-chain message.
- The bridge indexes signatures as they arrive on-chain.
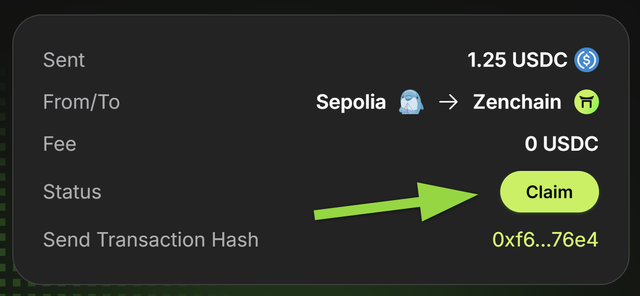
- When quorum is reached, a Claim button appears on your transaction card.
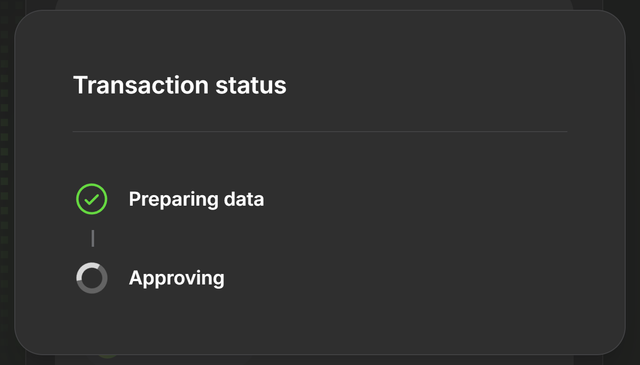
Real-Time transaction logging
ZenBridge logs each step so you can follow along:
- Preparing data — Gather inputs for the cross-chain message
- Switching network — Ensures your wallet is on the correct source chain
- Approving / Permitting —
- No Permit: waits for your Approve tx
- With Permit: requests a signature instead of an approval tx
- Lock & Transfer (External → Zenchain) — Locks tokens on the source chain
- Burn & Transfer (Zenchain → External) — Burns wrapped tokens on Zenchain
- Minting — Claims wrapped assets on Zenchain
- Unlocking — Releases original assets on an external chain
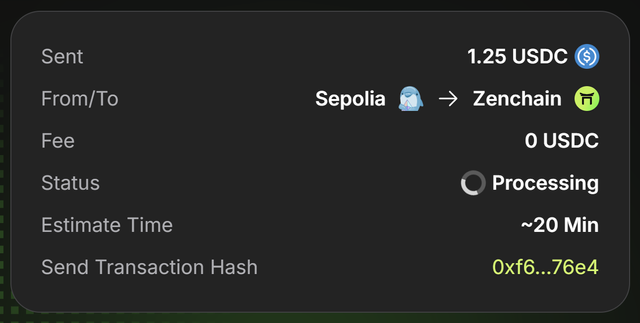
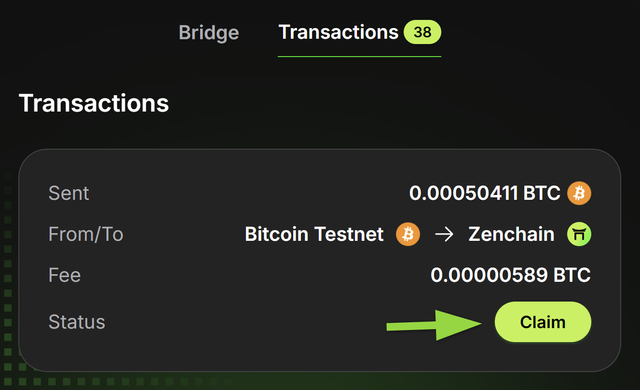
Transactions area
In the Transactions area, you can check the status of each transaction, whether it's in processing, needs to be claimed, or has been processed. At the top of the tab, you can also see how many transactions are still in the Processing state (not yet completed).
This helps you easily track the progress of your transactions and identify any that are pending.
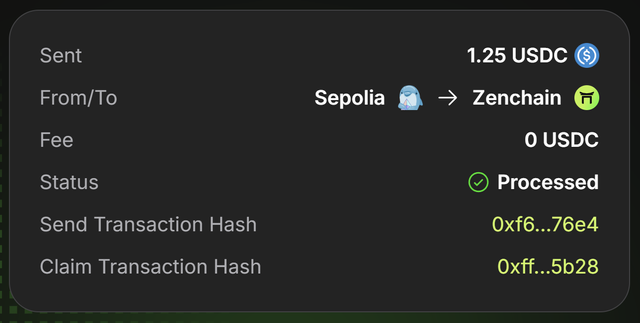
For each transaction, you can check the following details:
- Sent — Amount submitted
- From / To — Source and destination chains
- Fee — Bridge fee charged
- Status —
- Processing — Awaiting operator signatures / indexing
- Claim — Ready to mint/unlock on the destination
- Processed — Successfully claimed on the destination
- Estimated time — Rough time to completion (varies by network)
- Send transaction hash — Source chain tx (lock/burn)
- Claim transaction hash — Destination chain tx (mint/unlock)
Claim tokens
When signatures meet quorum, click Claim to finalize on the destination chain:
- Zenchain destination: executes a mint transaction
- External EVM destination: executes an unlock transaction
After claiming, tokens settle to your destination-chain wallet and the status updates to Processed.
Bridging Bitcoin (zBTC)
ZenBridge also supports BTC ↔ Zenchain via zBTC.
Deposit BTC → Mint zBTC (BTC → Zenchain)
- Get deposit address — The bridge generates a dedicated BTC address for you
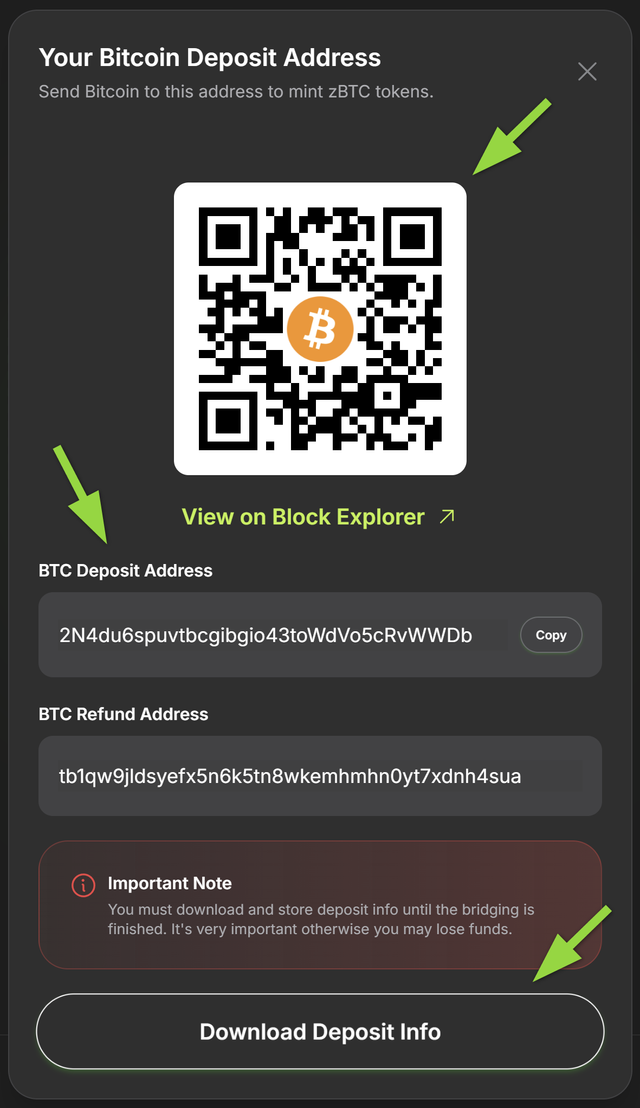
- Send BTC — Transfer BTC and wait for the required confirmations
- Operator signing — Operators sign the cross-chain message and publish signatures on-chain
- Claim zBTC — Click Claim to mint zBTC to your Zenchain wallet
Burn zBTC → Receive BTC (Zenchain → BTC)
- Initiate burn — Burn zBTC on Zenchain and provide your BTC recipient address
- Operator signing & payout — Operators assemble and sign the BTC payout; the transaction is broadcast to Bitcoin
- Confirmations — Once confirmed, BTC arrives at your address
Caution: Bitcoin transfers depend on network confirmation times and may take longer than EVM routes. Always verify the recipient address before confirming.
Tips & troubleshooting
- Can’t click Claim? Wait until the status moves from Processing to Claim
- Insufficient gas on destination: Fund the destination chain with native gas to execute the claim
- Token not visible: Add the token contract/address to your wallet if needed
- Wrong network in wallet: Switch to the network shown in the UI prompt