Deploy a Node with ZenChain Station
ZenChain Station makes it easy to deploy a node with a cloud service provider. You don’t need any technical expertise to get started.
On the ZenChain mainnet, a validator whitelist will be in place. This system ensures that only trusted accounts can become validators. The whitelist is a temporary security measure designed to protect the network. As ZenChain continues to mature, this whitelist will be progressively relaxed and ultimately removed.
Zazen MetaMask Snap (Optional)
If you’re using MetaMask, we recommend installing the Zazen MetaMask Snap. This Snap is an extension to the MetaMask wallet that securely stores your cloud provider information directly in your browser, so you won’t need to re-enter it in the future. You can learn more about it in the Zazen Snap Knowledge Base and Zazen Snap FAQ.
When you connect your wallet to ZenChain Station, the app will prompt you to install the Zazen Snap. Once installed, it works in the background with no extra effort on your part.
If you’re using another wallet, we suggest using a password manager to securely store your secret keys and cloud provider info.
Getting Started
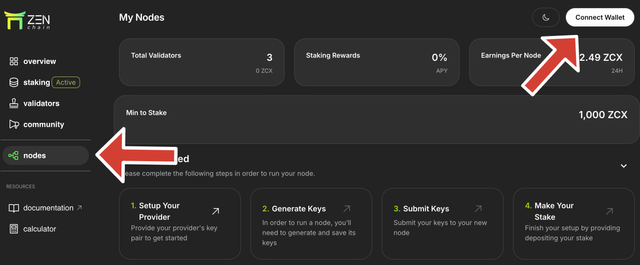
Connect Wallet
- Navigate to https://node.zenchain.io, click "Connect Wallet", and choose the Ethereum account that will serve as your validator. After connecting, go to the "My Nodes" page.
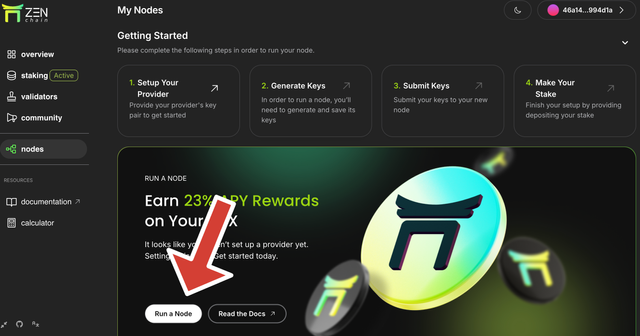
Open Node Setup
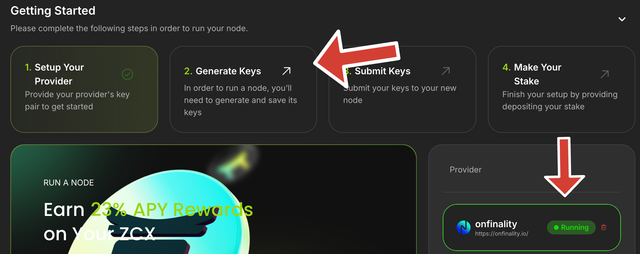
Click "Run a Node" to open the setup modal. You’ll be taken through the four steps to deploy your node and become a validator:
- Setup Your Provider
- Generate Keys
- Submit Keys
- Make Your Stake
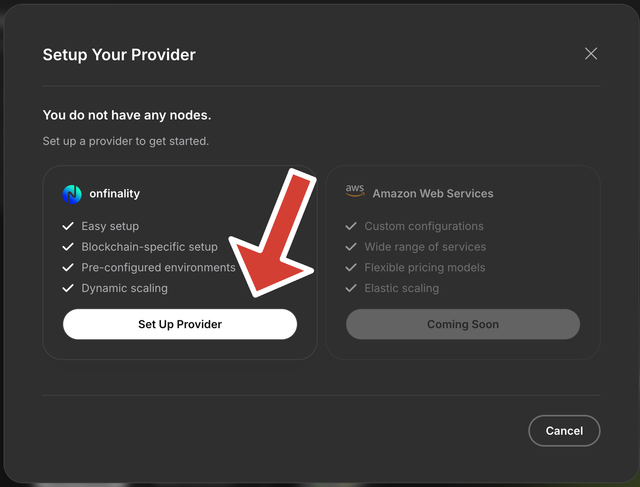
Set Up Provider
The first step is to configure your cloud provider. At the moment, ZenChain Station supports the OnFinality hosting service, with more options to be added later.
You will need to register an account with OnFinality and provide your billing information. We will need to obtain some more information about your OnFinality account in the next step, so you may wish to keep the page open and remain logged in to your OnFinality account.
OnFinality Keys
When you return to the ZenChain Station app, you'll notice that it is now requesting some data from your OnFinality account:
- Access Key
- Secret Key
- Workspace ID
These keys are used to automatically set up and configure your node. We do not save your OnFinality keys.They’re handled securely within the app and are never stored or shared.
Because we don’t store your OnFinality keys, we developed the Zazen MetaMask Snap. This Snap is a secure extension for your MetaMask wallet that stores your OnFinality data directly in your browser. By using the Zazen Snap, your data remains safe, and you won’t need to re-enter your OnFinality keys each time you access the app.
If you’re using a different wallet or choose not to install the Snap, you’ll need to manually enter your OnFinality keys each time. A password manager can help store them securely for easy access.
Get OnFinality Access Key & Secret Key
Follow these steps to get your OnFinality Access Key and Secret Key:
Enter Account Settings
Go to your OnFinality dashboard and click the dropdown menu in the upper-right corner to access Account Settings.

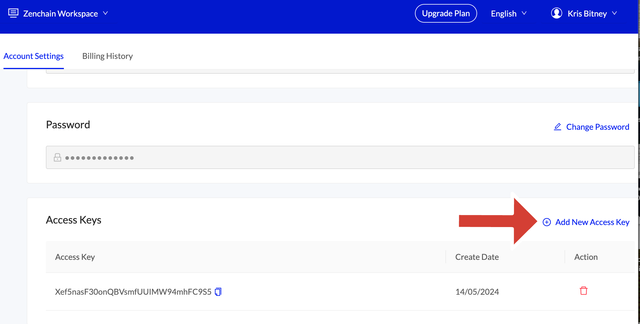
Add New Key
Scroll down to the Access Keys section and click "Add New Access Key".
Save Access Key & Secret Key
A modal will pop up to tell you your new Access Key and Secret Key. OnFinality will never show you your secret key again, so be sure to copy it and store it somewhere safe before closing the modal. If you are using the Zazen MetaMask Snap, the ZenChain Station app will store it in the Snap for you when you submit it.

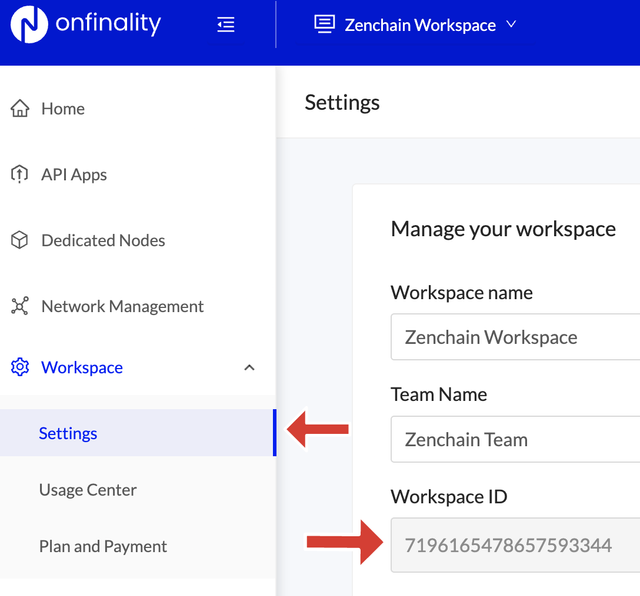
Get OnFinality Workspace ID
You can obtain the OnFinality Workspace ID by clicking on "Workspace" in the sidebar menu and entering workspace settings. The Workspace ID is located in the "Manage your Workspace" section of the workspace settings page.
Submit OnFinality Keys
After you’ve retrieved your OnFinality keys, enter them into ZenChain Station and click "Submit Keys". The app will use them to deploy your node.

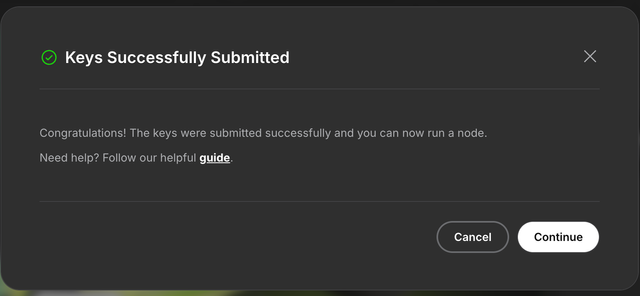
Step One Complete
Once you’ve submitted your OnFinality keys, you’ll get a confirmation that step one is complete.
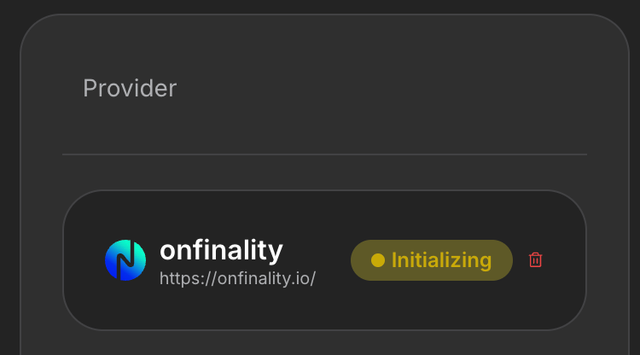
Provider Initialization
You will also see an indication that your Node is initializing and processing. Initialization may take a few minutes to complete. You can move on to the next step once it has finished.
Generate Session Keys
Your node in ZenChain’s consensus protocol is identified by Session Keys, which consist of three distinct accounts corresponding to different consensus mechanisms: BABE (for block production), GRANDPA (for block finality), and I’m Online (which signals to the network that your node is active during the session).
To generate your session keys, ensure that your node has finished initializing. Once ready, click on the box labeled "2. Generate Keys" to start the process via an RPC call.
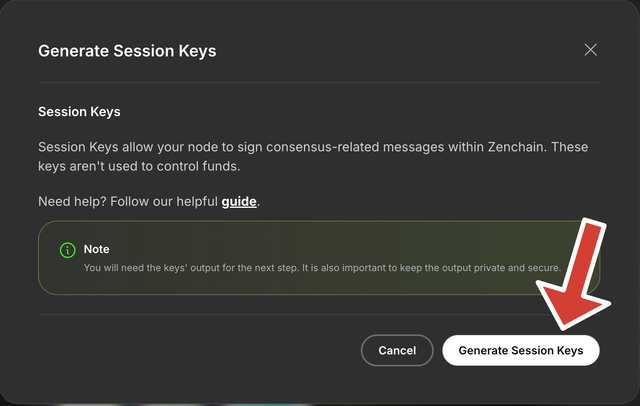
Generate Keys
A modal will appear to tell you about ZenChain's Session Keys. When you click "Generate Keys", the app will automatically submit an RPC call for you and provide you with the result.
The session keys can take a few minutes to generate. Please be patient and do not close the tab or click outside the modal.
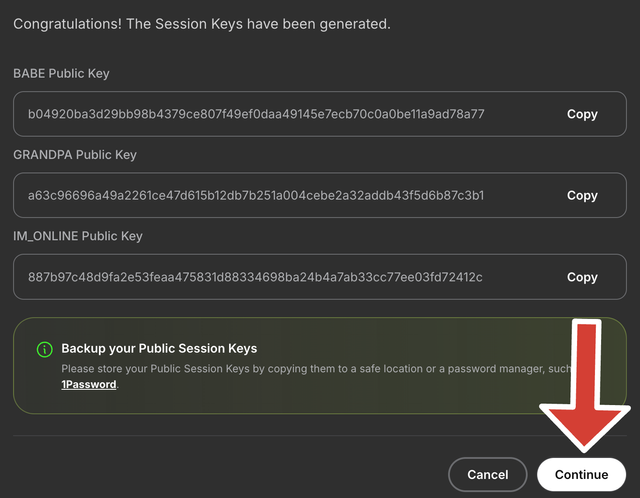
Save Keys
You may want to save the output from the RPC call--your Session Keys. Saving the keys is advised but not required. When you're ready to move forward, click "Continue".
Set Keys for your Ethereum Account
We still need to associate your node with your Ethereum account so the protocol knows who to reward for running your node and making ZenChain more secure for everyone. Click the box labeled "3. Submit Keys" to do this.

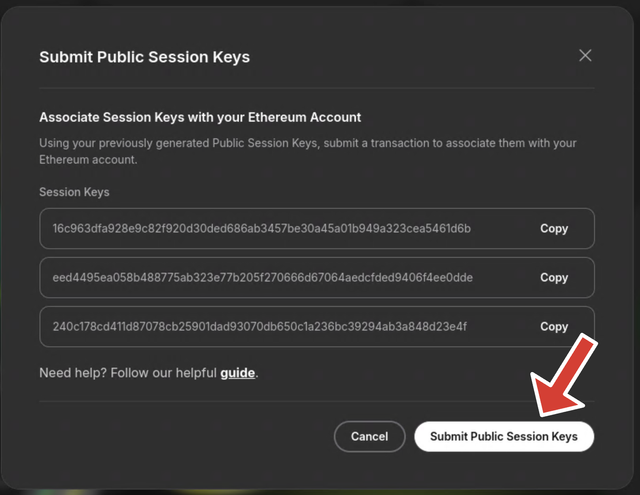
Set Session Keys
A modal will appear, asking you to review and submit the Session Keys you’ve just generated. Click "Submit Public Session Keys" to send the transaction to your wallet for signing. Once confirmed, your Ethereum account will be connected to your node through a pairing between the account and the Session Keys.
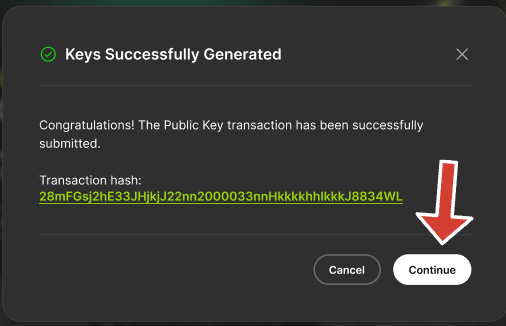
Step Three Complete
After submitting the transaction, you’ll receive confirmation that your Session Keys are set. Now, you’re ready to stake ZTC and apply for validator status.
Stake ZTC and Request to Validate
With your Session Keys in place, you can proceed to request validator status. Click "4. Make Your Stake" to start the staking process.

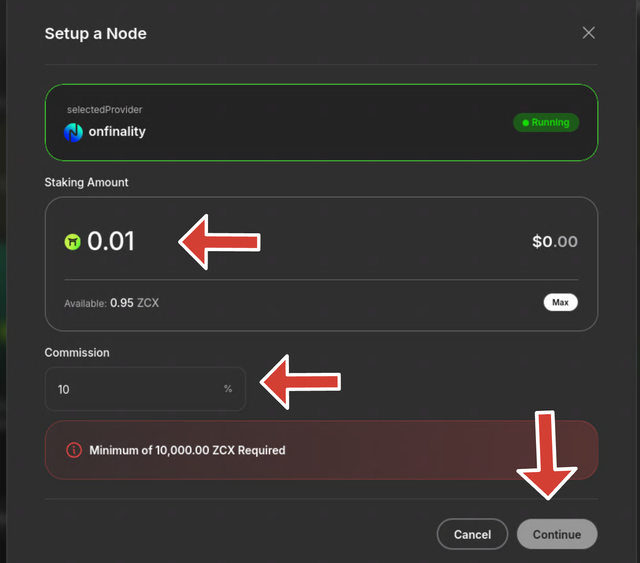
Stake Settings
Stake Amount:
Choose how much ZTC you want to stake. You need to stake at least ZTC to qualify as a validator. This ensures validators are invested in the network’s security.
Commission Rate:
Set your commission rate, which defines how much of the rewards you’ll keep. For example, if you set a 10% commission, you’ll retain 10% of the rewards while the other 90% goes to your nominators (and yourself, if you're staking too).
Be aware that a higher commission could make it harder to attract nominators, so finding the right balance is important.
Click "Continue" when you're ready to review a summary of your choices.
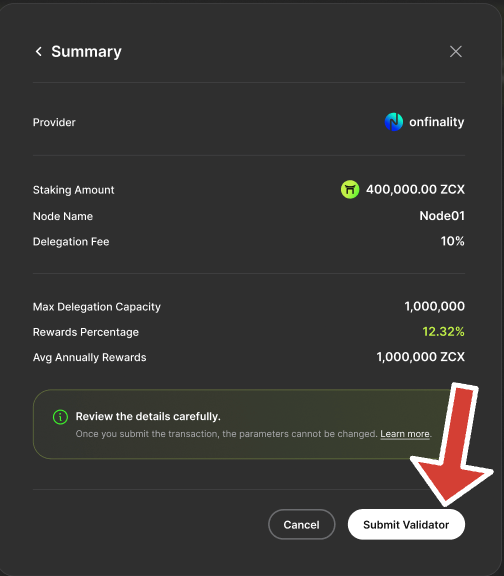
Review Before Submitting
Check your staking configuration carefully. If everything looks correct, click "Submit" to send the batch transaction to your wallet. This will bond your ZTC and declares your intent to validate.
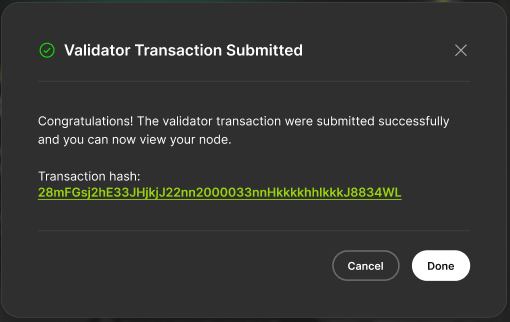
Step Four Complete
Once your transaction is confirmed, you will officially be a validator on the ZenChain network. Congratulations!
Changing Your Validator Configuration
It is easy to update your validator configuration. To get started, go to the "Staking" page of the Node Station app and click the button labeled "Stake". Go through the staking steps as if you were staking for the first time. Make the desired changes to your configuration and confirm your choices. You can change your validator commission and/or increase your staking amount. If you do not wish to increase your stake, you can input 0 into the staking amount input field.
The process is also explained in Changing Your Staking Configuration.